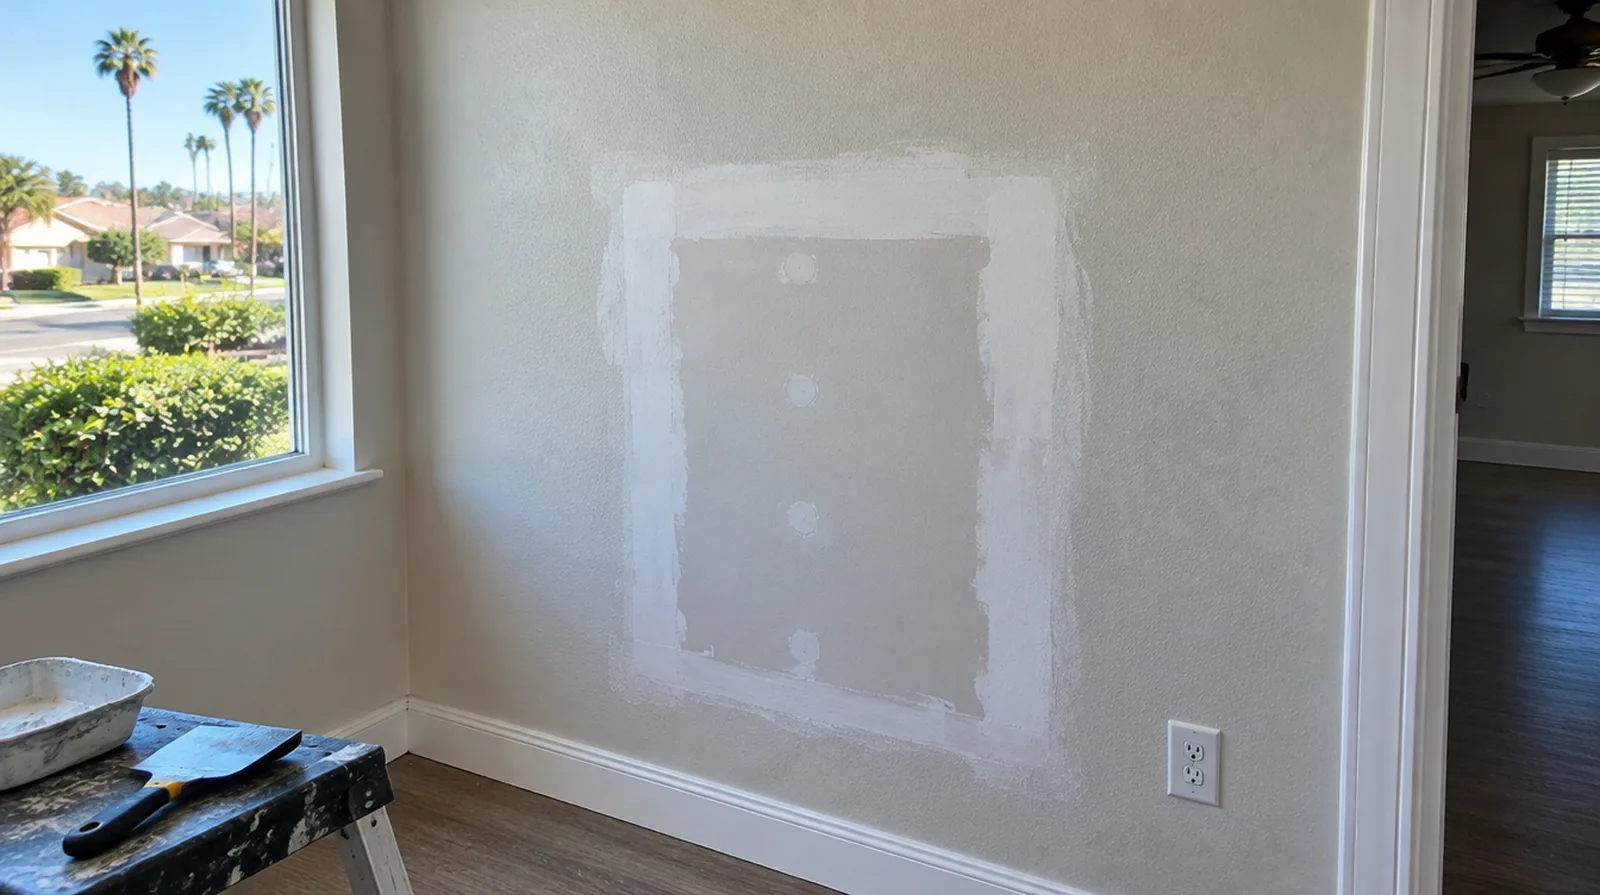
Prepare for primer
Fresh compound and existing painted drywall absorb coatings differently unless the repair receives suitable primer. Establish whether the quote includes priming or ends with a sanded surface ready for the painter. Where several contractors share the renovation, identify the inspection and handover milestones that determine when each following stage can proceed.
Protect adjacent surfaces
Fine gypsum dust can travel beyond the immediate patch unless floors and nearby furnishings are protected. Identify the possessions to move and agree which adjacent spaces need to stay usable. If scheduling is the main concern, separate hands on labor from drying intervals instead of treating every visit as a full day of active work.
Handle small fastener marks
A bump over a fastener may reflect separation or movement at the panel support. Adding appropriate fastening nearby may be necessary before the damaged spot receives finishing compound. At the handover inspection, review the finish from ordinary room positions using the lighting conditions that were agreed for the work.
Choose the patch boundary
Loose paper and crumbling gypsum must be removed until the surrounding panel can support a durable repair. Squaring an opening can create a practical edge for backing and a securely fitted replacement. For walls beside bright windows, review a dry sample from an oblique angle as well as looking straight at the repaired surface.
Document recurring movement
Cracks that return after cosmetic repairs deserve a conversation about movement or moisture instead of another quick cover. State any moisture or movement concerns that another professional must resolve ahead of the drywall repair. When reviewing the finished work, use the agreed lighting and natural room viewpoints so the assessment reflects the intended use of the space.
Review with side lighting
Use an angled view as well as a direct view when reviewing a finished patch. Checking from more than one angle helps separate surface imperfections from differences in coating sheen. If the coating stability is unclear, assess which layers are adequately bonded and which ought to be removed instead of simply hidden beneath new material.
Feather beyond the opening
Concealing a patch perimeter requires a tapered finishing area wider than the opening itself. A broad blend reduces the ridge that otherwise appears when light travels across the wall surface. If the completion date matters most, allow for intervals between coats as well as active labor rather than assuming the entire process happens continuously.
Identify the cause
Damage from an impact is not assessed in the same way as a seam that keeps splitting at a door opening. Check whether the wall feels firm and whether the defect has changed since it first appeared. If the space will remain occupied, identify a practical separation between the work area and the space that still needs daily access.

Build thin finishing coats
Shaping a repair through thinner coats gives more control than depositing all the material at once. Judge the previous layer only after it has dried adequate for the next operation. When the same defect has returned, share information about previous repair methods so the next assessment can consider why they did not last.
Support the replacement
A substantial hole is normally rebuilt with board and proper support, not filled entirely with finishing material. The replacement thickness of the board should match the current face so the joint can finish level. For an initial assessment from pictures, provide an overall room photograph and a detailed view of the defect so both context and scale are apparent.
Project context in Garden Grove
Before cleanup, review corners and baseboard edges that will remain visible after the furnishings return. A Garden Grove living room repair may be seen most often from the entry rather than directly in front of the damaged spot.
Scope questions before finishing
For a surface carrying numerous paint layers, discuss whether differences in the retained profile or sheen justify decorating a broader area.
For a limited patch requiring substantial setup, assess the complete package of access and protection rather than relating cost only to the opening size.
For a repair that crosses several surfaces, measure the affected planes separately so the estimate can explain where each finishing treatment starts and stops.
If the project is part of a larger remodel, settle the sequence with flooring, trim and cabinet work before setting a final finishing date.
If the wall work belongs to a broader renovation, coordinate its order with flooring, cabinetry and trim instead of scheduling finishing in isolation.
If the space will remain occupied, identify a practical separation between the project space and the space that still needs daily access.
When concealed damage is possible, establish how additional findings and any proposed removal will be recorded before the scope changes.
At the handover inspection, review the finish from ordinary room positions using the lighting conditions that were agreed for the work.
At a repair beside an opening, allow clearance for moving board through the doorway and space to use the finishing tools effectively.
If there is a fixed move in date, reserve enough time for the coating stages after drywall work rather than counting only the installation period.
Where existing floors will remain, specify protective measures and review the path used by panels, equipment and finishing tools.
When reviewing the finished work, use the agreed lighting and natural room viewpoints so the assessment reflects the intended use of the space.
Explore the Garden Grove drywall overview for related options, or read the project planning information before arranging the next stage.
More planning details for Garden Grove
Include that viewpoint when discussing how far the finishing blend should extend. Old paint layers and a subtle texture can matter as much as the patch dimensions, so keep the decorating plan connected to the surface assessment. If the room stays occupied, choose a practical place for furniture and define which route remains open during work.